Summary
This guide walks, step by step, through the process of adding a shared mailbox in Outlook.
Adding a Mailbox on Mac
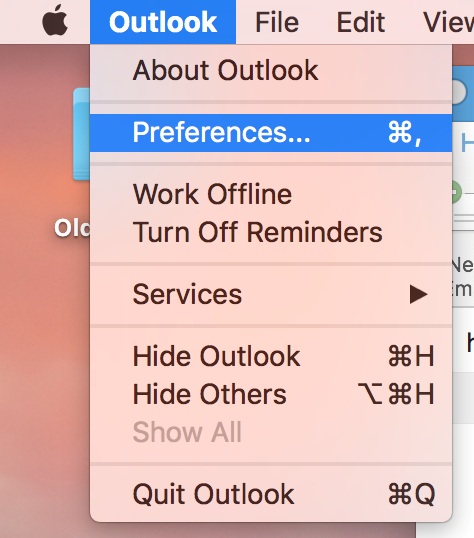
1. Open Outlook Preferences
Click on Outlook in the top left, and select Preferences.
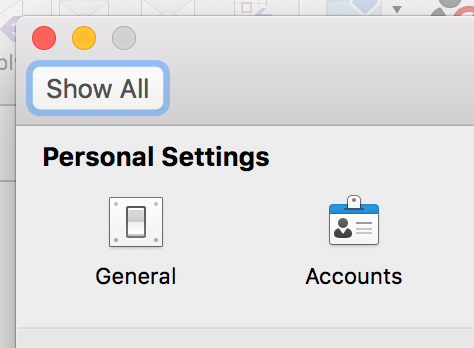
2. Accounts
Click on Accounts.
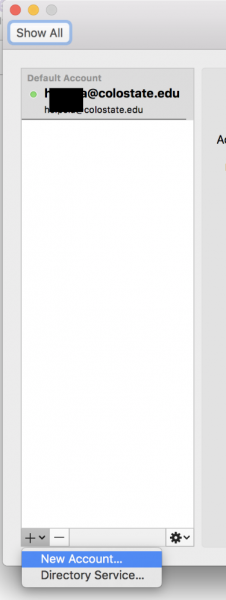
3. New Account
Click the Plus in the bottom left and click on New Account...
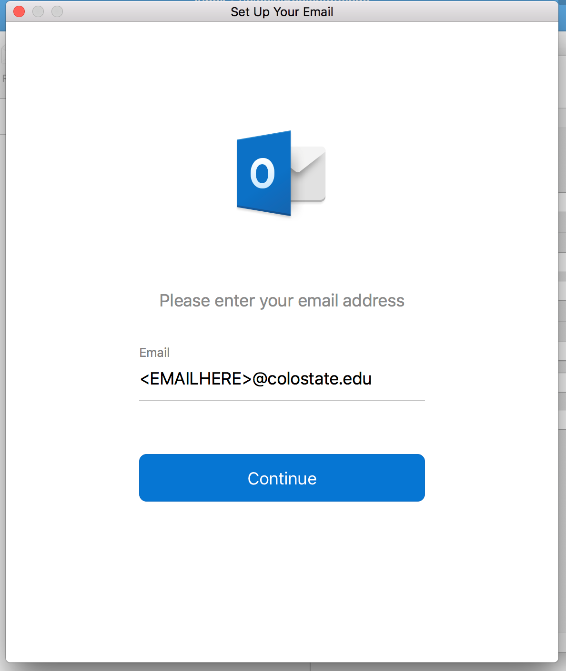
4. Enter the Email Address
Type in the email address of the shared email you want to add and click Continue.
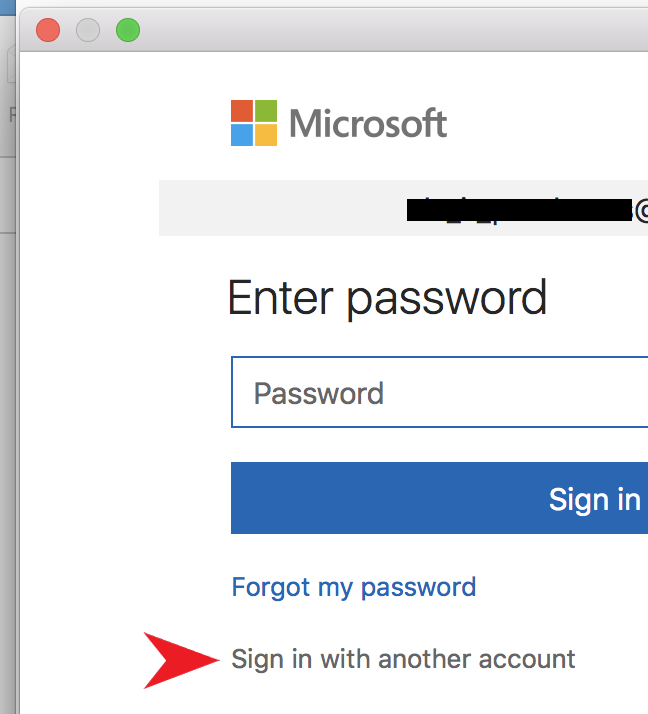
5. Sign In Options
On the enter Password screen, click on the link for Sign in with another account
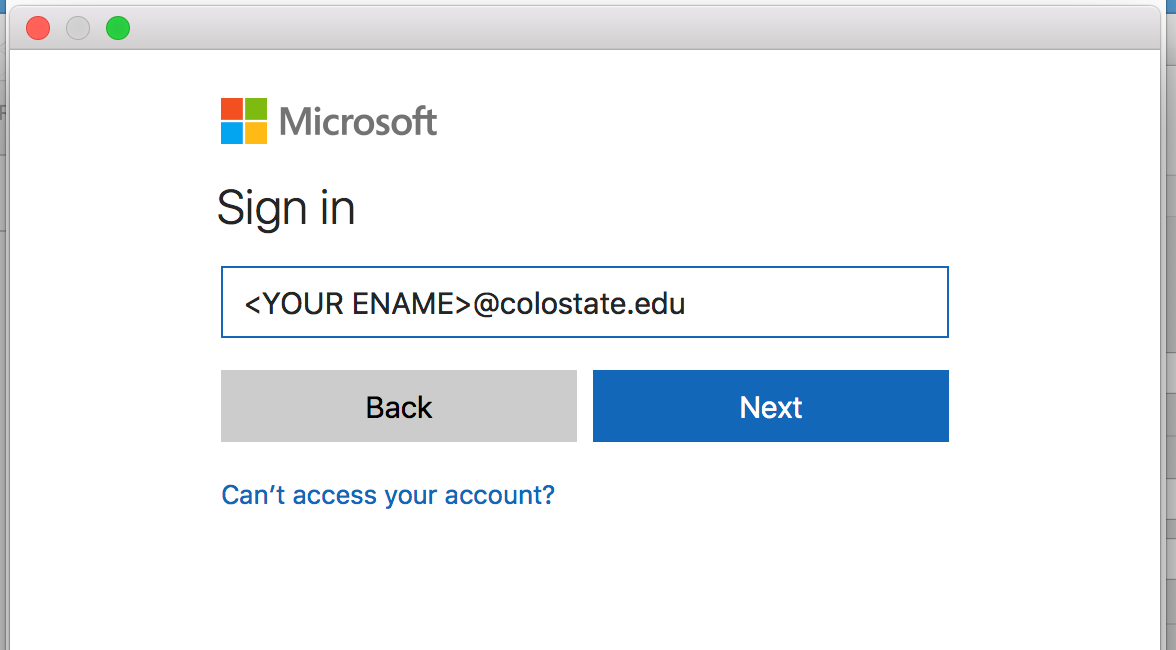
6. Enter Credentials
Enter in your own NetID@colostate.edu (please note, this needs to be your NetID username, not your first.last@colostate.edu), and then enter your NetID password, and click Sign In. This will connect you to the shared mailbox. Once the mailbox has been added you can click Done.

7. Using the Mailbox
The shared mailbox will appear on the left side of Outlook as an entirely separate inbox and list of folders.
Adding a Mailbox on PC
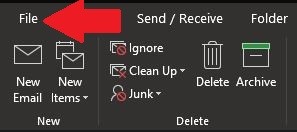
1. Open the File menu
In Outlook, click File in the top left-hand corner.

2. Open Account Settings
Click Account Settings, then click Account Settings again in the drop-down menu.
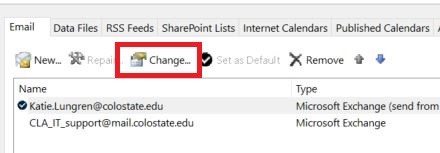
3. Change Primary Account
Make sure your primary email address is selected, and then click Change...

4. More Settings
Click More Settings
5. Advanced Tab
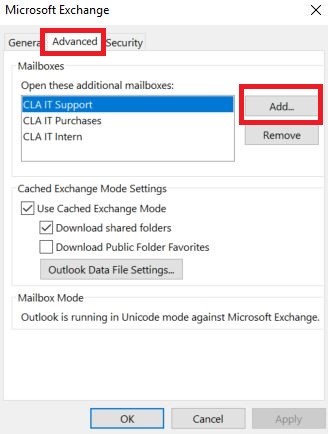
Click on the Advanced tab and then click Add...
6. Add the Mailbox
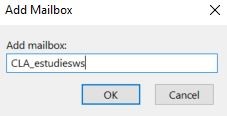
In the Add mailbox field, enter the name of your shared mailbox without the @colostate.edu at the end, and then click OK
7. Apply and Close
Click Apply, click OK, click Next, click Done, click Close