Your website must be on WordPress Multisite for the events management plugin, specifically referenced in this guide, to be available. A list of CLA websites that are on the Multisite system is available on the Site Managers page.
Summary
Whether you're needing to manage a large and frequent number of events, sometimes with complex schedules, details, and location information, or if you're simply needing to share the occasional couple of events on your website, manually entering and updating the events is not an option. To make things worse, manually managing events typically means information must be updated in multiple locations. For this reason we've implemented an events management plugin for all of our WordPress Multisite websites. This plugin allows you to create an event, just like you would a page, adding event details, such as description, dates, times, location, and recurrences. This guide will cover the most important aspects of the plugin.
Managing Events
Single Events
Events Menu
Once logged into WordPress you can see a list of all events for a website by clicking on the Events link from the left side admin menu.
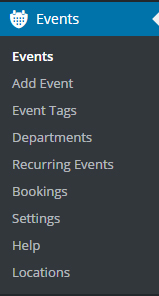
Events List
On the Events screen you will see a list of chronologically arranged list of all events for the website.
Note that if there are many events the list will likely be broken up into pages (1-30, 31-60, etc). To change how many events are shown per page click the Screen Options button in the top right corner and enter a different number into the "number of items per page" box.

Quick Edit
For each event in the list there is the option of making a quick edit by hovering the mouse over the row for the event and clicking the Quick Edit link.

From the Quick Edit panel you can make various changes to the publish settings and event attributes without needing to open the full edit screen, which can be a huge time saver when needing to make changes to multiple events.

Recurring Events
Recurring Events Menu
Once logged into WordPress you can see a list of all recurring events for a website by clicking on the Events link from the left side admin menu.
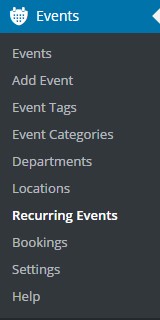
Refer to "Managing Events" >"Single Events" for remaining steps.
Creating New Single Events
Ways to Create a New Event
1. Admin Window
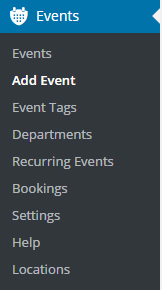
2. Existing Page
From the Events list screen or when editing an existing event there is an "Add New" button at the top of the screen so multiple events can easily be created in quick succession after setting an event title
3. Admin Bar
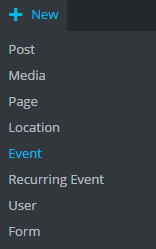
Any time you're logged into WordPress the Admin Bar will be visible along the top edge of the screen and from there you can select "New" and then click "Event".
Adding Event Information
To add an event title click inside the box labeled "Title" and enter the name of the event.

In the text box located below the event title, you may add any descriptive information about the event. You may use this box to add pictures and links as well. You may add headings by simply changing the "Paragraph" option to heading. The style will vary depending on the site.
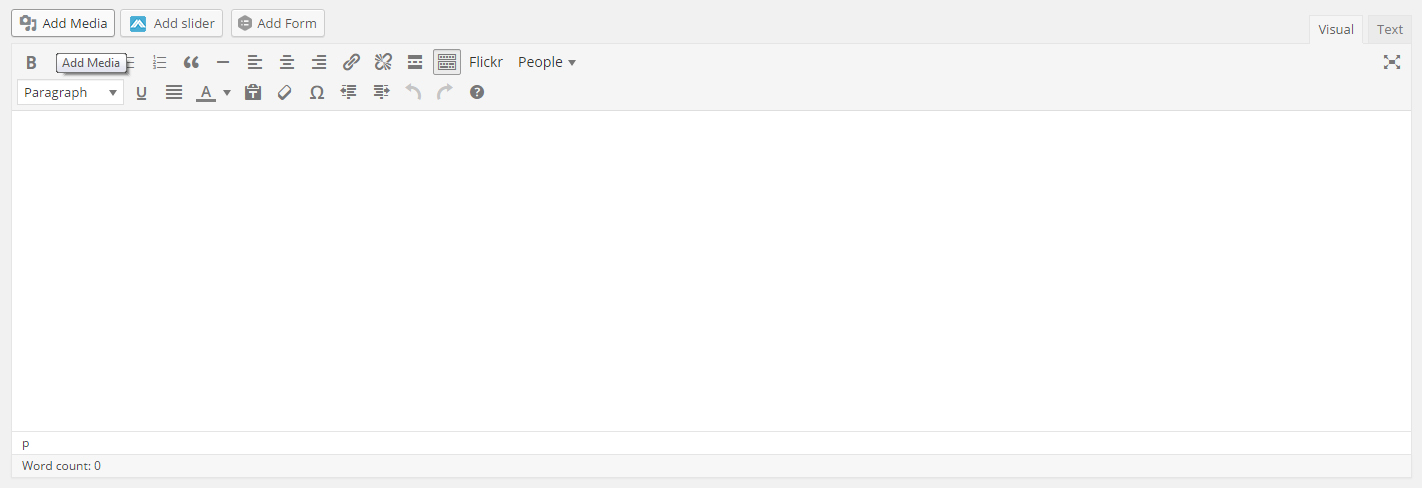
Note: the way something appears in the the text editor is not always the way it will appear on the web page.
The excerpt section is where you would add a short summery/text line of the event. On many of the sites, the excerpt is not displayed on the site itself, so this box may not be necessary.

Adding a Location
Scroll to the "Where" section and designate if the event has a location by clicking, or not clicking, the checkbox labeled "This event does not have a physical location".
If the event has a location, enter the location name, address, city/town, state/county, postcode, region, and country. As the information is added a map will appear on the right showing the location in question.
Always use the "Location Name" field to search for a location to see if it already exists. If a location does not exist, please follow the formatting rules and examples below for the title of the new location.
Location Title Rules:
If the location space has a room number, use "Room" followed by the room number. For buildings that have a long name and an associated abbreviation, use the abbreviated name (uppercase) in place of "Room".
If the location space does NOT have a room number, simply use the full name of the room, omitting the word "Room".
Location Title Format: {room name/identifier (optional)}, {full building name}
Location Title Examples:
- Room 101, Pathology
- Room A-201, Clark Building
- UCA 236, University Center for the Arts
- Avenir Gallery, University Center for the Arts
- BSB 119, Behavioral Sciences Building
- Artisan Framing

Setting a Time
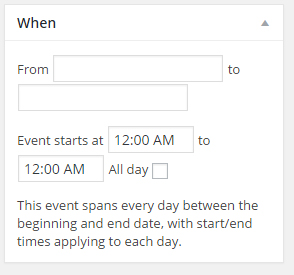
Once you've entered the location, scroll back to the top of the screen and look at the box in the right-hand corner. The "When" box is where you can set the time and date of the event. When you click on the first box, a calendar will appear and you can choose the date this way. If the event is only for one day you may either enter the same date into the second box, or you may leave the second box blank. The time boxes are defaulted to 12:00 am, so you will have to change it to the correct times. If the event lasts the entire day, you may click the "all day" box and the time boxes will become inactive.
Note: if the time of the event has passed, the event will no longer appear under the event section on the website.
Adding a Featured Image
If the website support it, a Featured Image can be added which is generally displayed either as a banner across the top of the event or in the events list.

Publish
Status: Can be set to "Draft", "Pending Review", or "Published".
Visibility: Can be set to "Public", "Password Protected", or "Private". Private pages can only be seen by those who are logged into WordPress.
Published on: Can be set to "Immediately" or a specific date.

Creating New Recurring Events
Caution: When adding a recurring event, multiple single events are created for each occurrence. If one of the individual events is edited the change will be made for only this occurrence.
If making changes to the recurring event, and the event is republished, any changes made to an individual event within the recurrences will be lost.
Ways to Create a New Recurring Event
1. Existing Page
From the Recurring Events list screen or when editing an existing event there is an "Add New Recurring" button at the top of the screen so multiple events can easily be created in quick succession after setting an event title.
2. Admin Bar
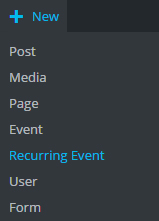
Any time you're logged into WordPress the Admin Bar will be visible along the top edge of the screen and from there you can select "New" and then click "Recurring Event".
Adding Recurring Event Information
Refer back to "Single Event" > "Adding Event Information"
Setting Recurrences
The Recurrences box is where you will set the dates and times the event will take place. You many choose how often the event repeats (daily, weekly, monthly, or yearly). "Recurrences span from" will produce a calendar when clicked. You may choose the times and the amount of days the event will span from.
Note: if you choose monthly, you may choose what days of the month the event will occur.

Setting a Location
Refer back to "Single Events" > "Adding a Location"
Setting a Featured Image
Refer back to "Single Events" > "Adding a Featured Image"
Publish
Refer back to "Single Events" > "Publish"