Department, or center, website must be running on WordPress.
Summary
For any website to be usable a visitor must be able to navigate from page to page, and in order to do that menus are critical. Creating and managing menus within WordPresss is very simple and this guide will walk you through the process.
Details
Length: 15 minutes
Updated: August 18, 2015
Required: Department, or center, website must be running on WordPress.
Creating and Assigning Menus
How to Create a Menu
1. From the WordPress Admin menu hover your mouse over "Appearance" and then click "Menus".

2. Next click the "create a new menu" link. Be sure to use a name for the menu that is descriptive and easily understood by others who may need to modify it in the future.

Assign a Menu to a Theme Location
Once a new menu has been created it will likely need to be assigned to a Theme Location. Theme Locations are designated spaces within the website design that are specifically meant to be used for menus, or navigation. A single menu can be assigned to multiple Theme Locations if you want to use the same links in those locations. Theme Locations are also preset by the website theme, so if you have any questions about them or would like to add an additional location please contact us.

Editing Menus
Screen Options
When editing a menu there are a few features that may be hidden unless the Screen Options are adjusted. The most important option will likely be "Link Target", which will allow you to set a link within a menu to open in the same window or in a new window. If you're not seeing an option that you think should be available, be sure to check the Screen Options.

Selecting the Correct Menu
Before editing a menu the first thing you'll need to do is select the correct menu. If the correct menu is already selected then move along to the next steps, if not select it from the menu drop-down list ("Navigation" in the picture below) and then click "Select".
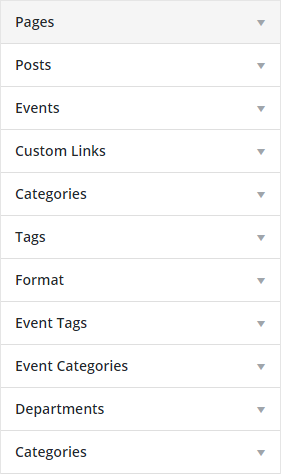
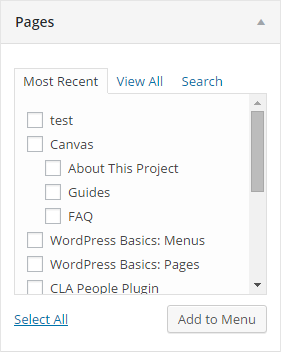
Menu Item Types
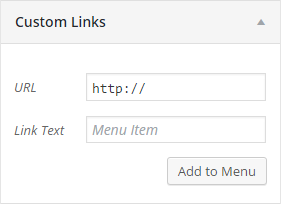
WordPress Menus are built based on existing pages, posts, and various taxonomies. You can see which items are available by clicking a type from the list. The most used types are Pages and Custom Links. Custom Links will allow you to enter a custom URL to a page that doesn't exist on the current website.
Advanced Tip: To create an internal link (when clicked it takes you to a specific location on the same page) you will need to create a Custom Link and set the URL to "#my-sample-internal-link", and add it to the necessary menus. You will also need to tell the web browser where to go when that internal link is clicked by adding an anchor tag to your page. You can do so by editing the page and switching from "Visual" editing to "Text" and adding "<a id="my-sample-internal-link"></a>" where you want the browser to scroll to when the link is clicked. The custom link URL and the anchor ID must match or else it won't work.
Drag and Drop Editor
The menu editor within WordPress is a drag-and-drop style editor. Once you've added a menu item to the menu from the Menu Item Types panel you can simply drag it into the position that you need. If you're needing to create a sub-menu (a menu that drops-down or expands) just drag the sub-menu items to the right to indent them under the menu item that you want to be the group container. Once all changes have been made be sure to click "Save Menu"
