In order to gain remote access to your desktop or connect to secure.colostate.edu, your device must be registered with DUO.
Navigate to https://www.acns.colostate.edu/duo/ and follow the steps provided to register your device.
Mapping a Network Drive
NOTE: If PulseSecure is not already installed and configured on your computer, please complete the steps described in Install and Connect to PulseSecure (PC) before returning to this documentation.
1. Open File Explorer
Select the File Explorer from task bar in the bottom left hand corner of your screen.

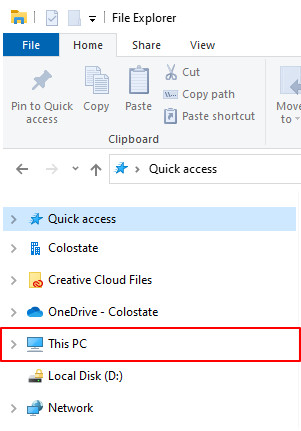
2. Select This PC
On the left hand menu, select the This PC from the list.

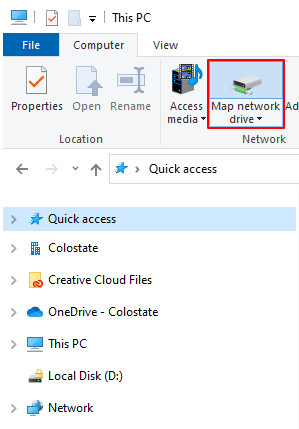
3. Select Map Network Drive
Click the Map Network Drive button from the ribbon toolbar at the top of the window.

4. Select the Desired Drive
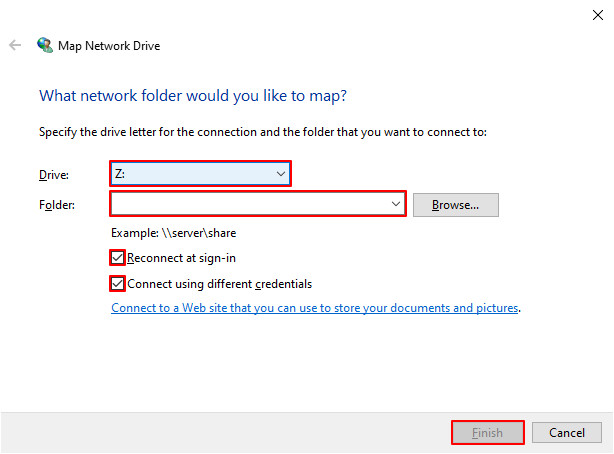
In the Drive drop-down menu, select the respective letter for the drive you need to map.
For example, J: drive is for J:/CLA_Resources
5. Enter the File Path
In the Folder field, enter the file path provided to you by CLA IT.
6. Select the Necessary Settings
- Check the box for Reconnect at sign-in
- Check the box for Connect using different credentials
- Click Finish

7. Enter your CLA Credentials
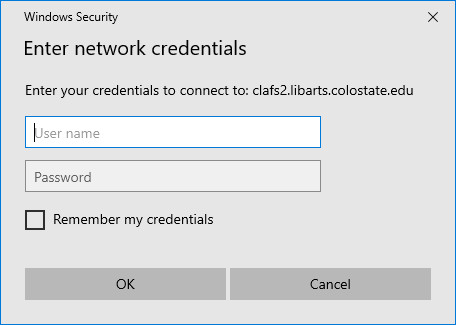
The first time you connect, you will be prompted to enter you CLA credentials. Enter libarts\username and your CLA password, then click OK.